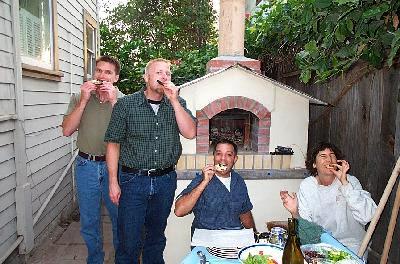
| First food! Four brave souls (Bruce, Pete, Holly and KC) came over knowing that with a
distinct chance of failure, we might end up having to eat at Lieu's Kitchen up the street.
But the results were spectacular! We had six pizzas and a roasted chicken, salad and wine and,
it made all the work worthwhile. The pizzas were crisp and beautiful. The chicken was crisp and juicy and splattered fat all over the hearth and doorway bricks
(but who wants their oven to look new and unused, anyway?). The rosemary on top of it, um, caught fire.
| 
|
| Yummmmmm! Happy people. Potatoes, Kalamata olives, capers and asiago. Feta, olives, basil and raddichio. Sausage, mushrooms and provolone. Eggplant and gruyere. There were others too. Finally Nutella (applied after baking).
The hearth was 750°F at the start and ended up at about 450°F.
I think 600°F is about ideal. The initial firing was short,
maybe an hour and a half, and pushed to the back kept things workable for over an hour of cooking. I'm really relieved at that.
90 minutes from start to first bite is very reasonable.
| 
|
| Stucco nearly finished (except for side near fence), starting on roof. A nice one-hour fire brought the hearth temperature to 560° and
the vault temp to 350°. That's getting toward pizza range!
| 
|
| Enclosed oven nearly finished & almost ready for stuccoing. I screwed chicken wire onto the
backer board walls to give the stucco something to grab onto.
|
|
| Enclosure filled with pearlite (an expanded volcanic glass, sort of like mineral styrofoam).
Took 15 cu. ft. of the stuff - nearly all of four large sacks ordered from the nursery.
The sides are made of Hardibacker, a type of cement board (backer board) used behind tile bathroom walls, screwed
into the steel studs.
The enclosure needs to be fireproof and weatherproof.
| 
|
|
Detail of chimney cap (an inverted wok), with mocked up cardboard holder.
Ken Moeller did the welding to make the real thing -- thanks, Ken!
The terra-cotta flue pipe cost $2 at Urban Ore, our local salvage yard.
|
|
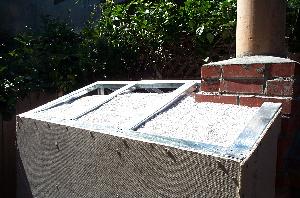
| Here the brickwork has been encased in concrete about 2 to 3 inches thick all around, to add strength
and retain heat. Lightweight and inexpensive steel 2x4 framing now surrounds the clad oven. Gave up on the idea of using vermiculite/cement
insulation and stuccoing that directly, I think it would be too fragile. Instead
I've built a rigid box around it with a tin roof. It'll look better too, I think. |
|
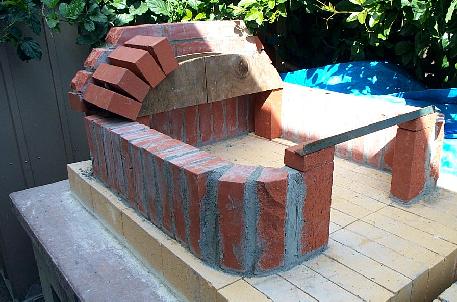
| Entry arch mocked up on its form. Here the oven vault itself is finished
except for the row of bricks angling down from the arch to the doorway.
Just got the idea of noodging the entry arch forward an inch this morning.
The back wall of the chimney will sit on the angled bricks and the front
wall on the entry arch. I think this will work, anyway. |
 |
| Front view showing the oven vault under construction. After the brick
vault, entry arch and chimney are finished, the brickwork will be encased
in 2" of concrete and four inches of vermiculite/cement insulation. Then
the oven and the block base will be stuccoed. |
 |
| Close-up of the brickwork under construction. The entry arch will be
built out from the doorway, out to the front edge, covering the ash slot.
I put a few bricks on the arch form to show its shape. Note: the angle iron shown at the doorway is not what I ended up using. The real support was wider and thicker. |
 |
I have more pictures. I'll try to scan them soon and make a complete
construction pictorial. I added a sketch to the Construction
section.


